
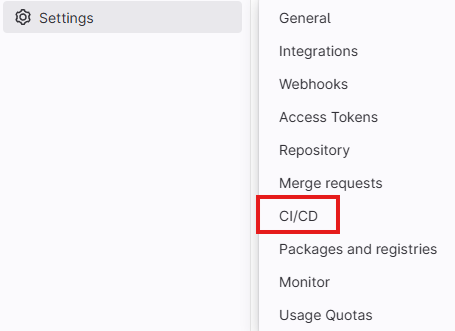
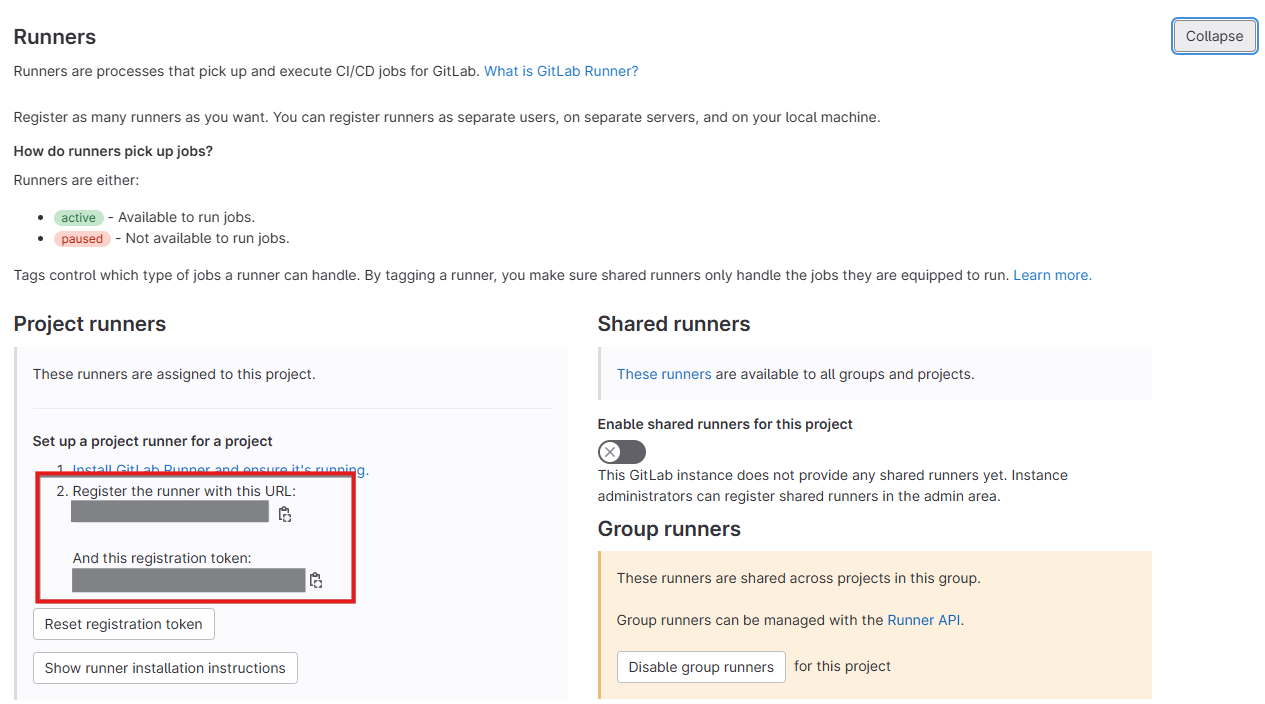
1. GitLab Settings에서 필요한 정보 확인하기
2. CI/CD를 적용할 서버에서 gitlab-runner 설치하고 등록하기
# 1. GitLab 공식 패키지 레포 등록
curl -LO https://packages.gitlab.com/install/repositories/runner/gitlab-runner/script.deb.sh
sudo bash script.deb.sh

# 2. GitLab Runner 설치
sudo apt-get install gitlab-runner -y

# gitlab-runner 등록
sudo gitlab-runner register
gitlab-runner를 등록할 때 URL과 token은 위에서 얻은 정보를 기입합니다.
Tag도 필수로 입력해줘야 합니다.
3. gitlab-runner 서비스 실행
sudo systemctl enable gitlab-runner
sudo systemctl start gitlab-runner
sudo systemctl status gitlab-runner
4. .gitlab-ci.yml 파일 구성
프로젝트 루트 디렉토리에 `.gitlab-ci.yml` 파일을 구성합니다.
공식 문서는 링크를 통해 확인할 수 있고, 저는 다음과 같이 구성했습니다.
stages:          # List of stages for jobs, and their order of execution
  - deploy
  - notify

deploy-job:      # This job runs in the deploy stage.
  stage: deploy  # It only runs when *both* jobs in the test stage complete successfully.
  tags:
    - algorithm0
  environment: production
  rules:
    - if: $CI_COMMIT_REF_NAME == "main"
  script:
    - echo "Deploying application..."
    # 실제 명령어
    - echo "Application successfully deployed."

notify-slack:
  stage: notify
  tags:
    - algorithm0
  needs: ["deploy-job"]
  script:
    - echo "Sending Slack notification..."
    - |
      curl -X POST -H 'Content-type: application/json' \
        --data "{\"text\": \"$MESSAGE\"}" \
        $SLACK_WEBHOOK
  rules:
    - if: $CI_COMMIT_REF_NAME == "main"
  when: on_success